I do love it when you work out a solution to a problem –
especially when it doesn't involve paying someone/buying something/spending
hours searching on the internet. It can be as simple as a system for taking
washing off the line (Things that needs a hot iron off first so they are at the
bottom of the basket and will be ironed last when the iron is the hottest), or
for keeping you Tupperware drawer tidy (lids all in one spot people!).
Thankfully this was a bit more of an interesting problem to solve – how to keep
melted chocolate, well… melted.
After my recent
fondant fetish (click here and here and here!), I had started experimenting with melted chocolate as a
decorating tool. It started with plans for Son 2’s Minecraft birthday party,
which involved making black shapes for Creeper faces.
 |
| This is a Creeper. It explodes if you get too close. Just so you know |
While I was wandering the cake supplies shop, I noticed that
black chocolate melts were much cheaper per kg than the black fondant. Interesting.
PLUS chocolate could be piped in fine lines for smaller creeper faces (which I was planning to put on green rice krispie squares for taking to school) , where as
it would be annoying to cut out very small slivers of fondant. AND it always looked so
easy when my You Tube bloggers used it – what could possibly go wrong?
Well.
Melted chocolate
assumes a liquid form. And the hotter it is, the more liquid it becomes, to the
point of it oozing and not making pretty straight lines like you are supposed to. Not
good when you are a perfectionist bordering on–OCD.
 |
| Not my finest work. They either look possessed, evil or stupid (still tasted yum though). |
Melted chocolate also has a tendency to set when it cools.
And this doesn't always happen once it is piped out, it can also happen while
it sits in your piping bag. Which leads to lumps of semi solid chocolate
blocking up your piping nozzle, and it coming out unevenly. Which leads to much
Fiddling and Fixing and Touch Ups and Swearing and Stress.
 |
| Like a Monet - good from a distance but a mess up close |
At first I thought it was just the colored chocolate, as it
took quite a while to melt and didn't really mix together very well. But when I
had the same problem using good ol’ Cadbury that I realised it was a Chocolate
Issue.
 |
| My Groot Sundaes: more "messy" than "gnarled tree" appearance (click here for what they were supposed to look like) |
So a solution had to
be found. Especially with my plans to make gingerbread trees for my Christmas
gifts this year.
At first I tried
microwaving the chocolate intermittently, which worked well. I found I could
ice and decorate four trees before it needed a minute in the microwave. But I
had to unscrew the metal piping tip and scrape out the solidified chocolate
each time. Annoying. And stop piping. More annoying.
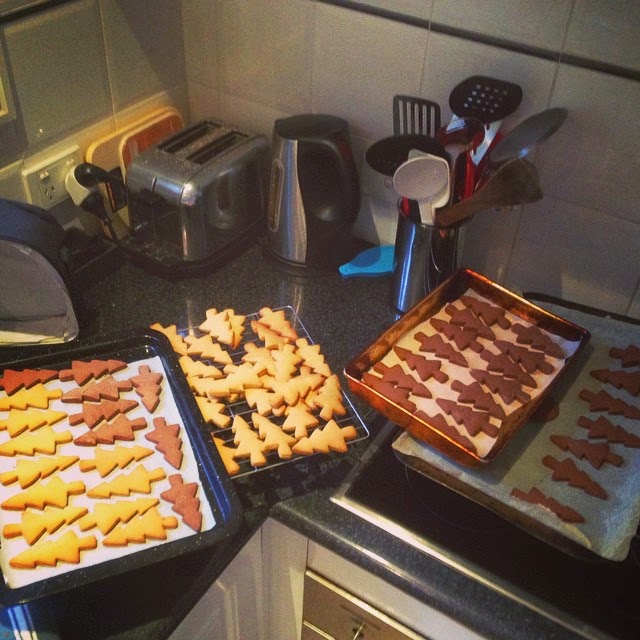
 |
| LOTS of gingerbread trees! (this was batch 1 of 3) |
I did think about
some sort of hot water bath to put the piping bag in, but I have found the no matter how carefully you seal the bag up or pop it in several plastic bags,
water still gets in and ruins your chocolate. Not helpful
There are cool cups (as
in Cold, rather than Clever and Awesome) that you can put in the freezer to
keep your drinks cool over summer, I just needed a Hot version .
So I made one myself!
Pour boiling water in a large cup, place a smaller cup inside and voila!
(I shall add a picture here when I take one at this weekend's piping session)
Pop your piping bag in it in between sprinkled sanding sugar
or carefully placing cachoos and you are ready to for your next set of trees.
So simple, so cheap, so effective, so clever (well, I think so).
 |
| Oh! Christmas tree (s) |
In other Kitchen News, I received a kitchen blowtorch at the
weekend, so look forward to a creme brulee post in the future (which will
hopefully not be entitled “What can go wrong with a Kitchen Blowtorch" or "Effective Ways to put out a Kitchen Fire")
