Search This Blog

Showing posts with label cupcakes. Show all posts

Tuesday, 25 February 2014

Baking it 'til you Make it

 My Hubby jokes that every time I try a new recipe, I always miss one (or three) ingredients. This can be due to the "I'm sure I have enough coriander/pesto/palm sugar etc in the fridge or cupboard" wishful thinking, or just totally misreading the ingredients list. I say this proves what a resourceful and experienced cook I am, in that I can always adjust or adapt to make something that closely resembles what it is supposed to. Hubby says it proves that I do things too fast and don't concentrate enough. He might have something there...
 But I do find that this can be one of the fun parts of cooking. Recipes are all well and good, but there aren't many in my receipe book that haven't had one or tweaks by me after the official First Bake (where I do really try to follow the receipe to the letter). And some people (like my sister-in-law) don't even use receipes at all! (which rather scares me) She calls herself an Instinctive Cook - a bit of this, a bit of that, trying to recreate dishes she's seen. I have had some amazing salads from her, but she is also the first to admit that she isn't a baker. Which makes sense, as there is a lot of Science and Measured Ingredients in baking, and if you gets one thing wrong you can often end up with Sludge. Sometimes delicious Sludge (like my many failed attempts at Chocolate Mousse), but looking nothing like picture.
 And THEN you can have a plan or receipe that you follow to the letter (and even have ALL the ingredients) and it's still not right. Or you decide half way through to change (either by force or choice) and it turns out better than the original plan. It's like the old performing adage: If you keep smiling, no one will know that you've stuffed up (or Fake it til you Make it). So here follows my latest baking adventures - for better or worse.

 The first one was another Nerdy Nummies inspired baked off. She did two "roll cakes", which I think in Australia we would call it a Swiss Roll. But the clever thing was that she baked a design into the cake! A plain one and a chocolate one. So clever, and a little bit fiddly but looked really impressive. So with Valentine's Day coming up (where Hubby and would I both be working, so no chance of a romantic dinner or date night), I thought I would bake something for Work.

 I decided on a chocolate heart cake and so created my own template.


 The decoration batter was mixed and coloured pink, piped in hearts and popped in the freezer.

 I then set about making the actual cake batter; which didn't seem to go quite far enough on my tray (I had decided to make a half batch as I had a smaller tray than Ro). So in the spirit of We Can Fix This, I decided to make another quarter batch of cake to fill the tray.

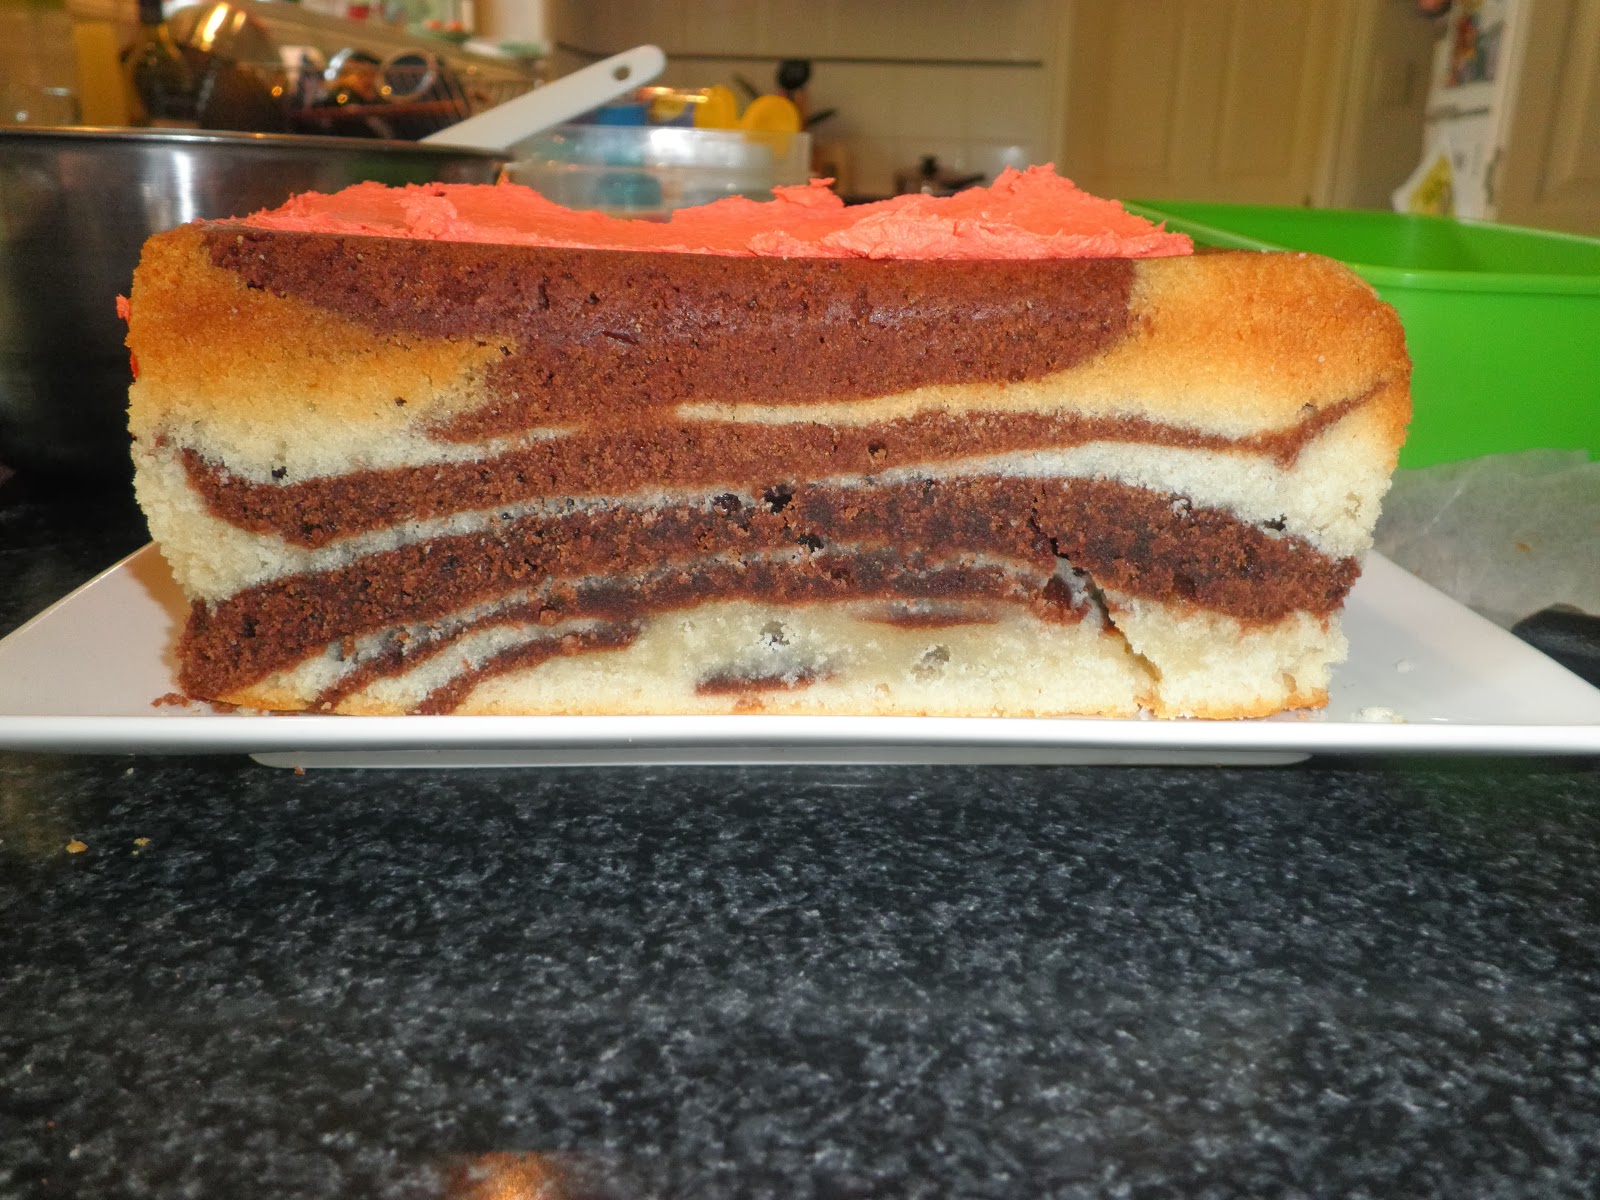
 I then realised that my cake was a very lovely shade of white. Hmmmm. Must have missed the Adding the Cocoa step. It is the only disadvantage of getting a recipe from a video is that most times there isn't a written step by step instructions. Ro is great as she does have an ingredients list in the information section. What I had done was written down the ingredients (including the 1/4 cup of cocoa) but then followed the Plain Roll Cake instructions and forgot to add the cocoa with the flour. Not to be daunted, I knew there was a way to salvage what was becoming a bit of a cooking disaster: I scraped the entire cake (pink batter and all) into a bowl, added the cocoa and then added the other one-quarter chocolate batter I had made. After re-piping and freezing another load of pink hearts, I added the batter, which seemed to at least fill the tray. A quick burst in the oven and it came out looking really cool....


 Hooray! I fixed it!
(well, apart from forgetting to bang the tray on the bench pre-baking which accounts for the extra air bubbles)

 I rolled the cake up and left it cool over night; rather then adding the cream and strawberries then which would make the cake soggy overnight.

 Valentine's Day morning I unrolled my cake and was a bit dismayed to see that it had cracked; had I left it to cool too long in the rolled up position? Had the run of warm weather we have had in Melbourne lately dried it out too much? It still looked rather cool, and with a few well placed toothpicks, it still did kind of look like a roll.


 Thankfully it tasted yummy and everyone "ooohed" and "aaahed" and "how did you get it looking like that?!?". So that was positive and saved it from what may have been a total disaster.
 However.

 It wasn't what I'd call a total success.

 So with a piping bag still half-full of pink batter, I resolved to try again. I had a family lunch the next day which gave me a chance to be creative and try "freehand" drawing without a template.
 Again, came out of the oven looking really clever.

But AGAIN, it cracked after cooling, even more than the chocolate one! Thankfully again, it held together and still looked really clever.


 And luckily, Family are very forgiving and enjoyed it regardless of the cracking. "Tastes great Mum!" said Son 1 helping himself to his second slice.
  

 So two yummy and cool-ish looking cakes. But it did leave me a bit unfulfilled in that I hadn't got either of these cakes to look as good as Ro's. In mulling over this, I may have had the cake too thick which caused the cracking: for the second cake I made the full cake mix but put it on a tray nearly half the size. So IF I ever try this again, I will ensure that I get the right size tray. It is a cute technique that could easily be adapted to a traditional round cake; kind of "icing" it before it bakes!

 The next Baking Adventure was a birthday cake for me! This was inspired by another You Tube channel that I had been put on to by a baking buddy - My Cupcake Addiction. I may have stumbled across this amazing channel previously but had been scared off by her abundant use of fondant. However in my post-fear-of-fondant baking days, I was very excited by what I saw (I think I even squealed). I had seen her work before; I had Pinned a Christmas wreath cake made out of cupcakes as a potential work Christmas treat. I then saw the Christmas Tree cupcake cake, which led me to all sorts of clever Cupcake Cakes. Its such a simple-but-effective idea (bake cupcakes but ice them to look like a whole cake) and I wondered why I hadn't come across it before! So I decided to  make a Star cupcake cake.

 I used empty cupcake papers to decide how many cakes to bake and duly baked them. As my electric oven is not the worlds greatest, and I baked them in three different tins there were not all beautifully and uniformly rounded as they always look online. No matter - frosting will hide all manner of problems!!


 I had made white chocolate ganache and was going to pipe it onto each cupcake (and fill in the gaps) but quickly realised that Piping used up a lot more ganache than the frosting method! In fact I had only piped half the cupcakes before I ran out: What to do?!? Did I do the mad run to the store to buy more cream to make more ganache that then had to be cooled as quick as possible to allow it to be piped? Or adapt?

 I adapted.

 So it changed from a swirly-piped cake to a ganache-as-frosting cake. It still looked like a whole "cake" which I guess is the idea, and considering how rich the white chocolate ganache is, less was probably a good way to go!


 Next, to make the edges of the star I was going to pipe with left-over red frosting from the Lego block cake, but again it didn't look red enough, especially compared to the red cupcake papers. So I used the frosting to stick the cupcakes to the board, and used the red fondant that I still had in the cupboard from the Marvel cupcakes, which looked much more effective.


 Looking good, but how did it go on a practical level? The kids loved it as they could just pull off a cupcake and eat it (well, lick the icing off the top anyway!). It was a bit weird "cutting the cake" at Happy Birthday tine; I ended up cutting half-way through one cupcake (no touching the bottom with this cake!). But overall - a success.

 So there you go - two examples of Best Laid Plans going astray, which turned out all right in the end. Hooray!


Tuesday, 21 January 2014

A Marvel-ous birthday

 One of the great things about being a Foodie, and thus reading lots of recipes/food articles and following blogs and flogs and such, is that you are exposed to sooooo many Cool New Things that fellow cooks, bakers and Domestic Goddesses are whipping up in kitchens around the world. The downside of this is the limited time I have to potter around in MY kitchen to recreate and reinterpret the awesome things I see. So I do end up with quite a long list of  Recipes and Techniques to Try, which I then have to mull over every time I have a dinner or event to cook for, and try and decide which one I am going to try next. Dramas!

 So when I had a chance to combine two or three things recently, it was a bit exciting:  As Hannibal (from the A Team) used to famously say, “I love it when a plan comes together.
 Son 1’s birthday is in January and that means a Kids Party to plan and produce. The Party Boy gets to pick the theme (with veto right from me to ensure I think I can work within said theme) so over the years we have had various Superheroes, Star Wars, cars and such. Never one to have a broad theme, this year we’re having a Lego Marvel Superheroes Party. Yes, it is a party based on a Play Station game where all of the superheroes and villians from the Marvel Comic universe are rendered in Lego (check it out if you're into games, its heaps of fun)

Son 1, being quite a intuitive one, requested the usual party food as well as, “Mum, can you do some cupcakes too?”. Hmm, an opportunity to play with more decorating techniques? Well, as you asked so nicely, of course!! A quick Pintrest search of “Marvel Cupcakes” gave me a host or heroes to choose from, as well as various ways to create an Iron Man mask (though the Nerd in me did get miffed to see them alongside Batman and Superman cupcakes – they are DC Comic not Marvel, people!!). A quick review of the fondant and frosting colours available helped me decide who would make the grade and off we went.

I can't work out how to rotate this pic!!
 For Hulk I used green frosting, the rest had red fondant bases, with black fodant details or yellow and blue frosting, with the ol' faithful black (and white) writing icing for the detail.

 For The Birthday Cake, I was at a bit of a loss. In past years, I have done a Spiderman (see here ) as well as an Iron Man cake, so I was loath to repeat myself. The trusty printed Cake Toppers that have served me so well in past years were no help, as this game was only released 3 months ago and I don’t think the Cake Topper (or party decorations) people had caught up yet. Hubby suggested creating a scene from actual Lego figurines on top of the cake which was a great idea, but I wanted the kids at the party to actually Play with Captain America and Loki and such, so another idea was needed.

 Thankfully Ro at Nerdy Nummies came to the rescue with a cake that was so simple in its execution but looked so fantastic (my kind of cooking!) – a Lego block Cake
  And while I was re-watching how to make a Lego Brick, I was reminded of another cool technique I had seen her use: A Zebra Cake. Kind of like a cooler version of a marble cake, but I thought it was something that might really impress a bunch of 8 year olds.
 Now although I am a huge fan of Ro and her “nerdy themed goodies”, I do despair at her regular use of Box Cakes. I’m sure it an American thing, but I have about 3 or 4 cake recipes that are probably just as quick and easy (and yummier) than a packet mix. So I decided to use one of these. My standard Birthday Cake is a buttermilk cake that I found in Delicious magazine – it was a recipe for Cannoli cupcakes (you use ricotta cheese instead on cream cheese in your frosting), and I found that the cupcakes were nice and solid without being too heavy, and that if you combined the mix in a cake tin, you also got a lovely solid (not too heavy) cake that stayed moist for a day or two. This is very helpful when you are icing cakes over several days (which I often have to do due to work and child-minding time constraints!). To make a chocolate version, I just added 3 TBSP cocoa powder to my flour and off we went.
Chocolate and vanilla ready to go
 As I started alternately pouring the mixes into the prepared pan, I was reminded of how thick a mixture this cake makes; great for cupcakes and cake tins but not so good for mixing together in nice concentric circles.

  Hmmm – might have to find a runnier cake mix for next time. But it did still look zebra-ish as it went into the oven so that boded well.
  The loaf tin did make it take a looooong time to cook; over an hour in the oven, and the edges were getting quite browned, so perhaps runnier mix and round tin for take 2. But was looking good otherwise...
  Onto the decorating!!
  The first difference I noticed between mine and the Nerdy Nummies cake was the colour of the frosting. No matter how much of the colouring I added, I couldn't get it to that nice brick red colour (and I was using the proper cake food colouring). I think the frosting Ro used is bought pre-coloured, which would explain the vivid shade. As I had red fondant, I did toy with the idea of using that instead, but I couldn't get my head around how to cover the marshmallows. So I stuck with my red-but-slightly-dark-pink frosting and hoped that Son 1 wouldn't mind!
 Icing the marshmallows for the brick "bumps" was also a challenge. Ro dipped hers in the frosting, another example of where the pre-bought frosting was easier as it is much runnier than mine (I have used it once on a cake and actually found it quite difficult to work with!). The butter frosting was quite thick and tricky to get onto the marshmallow; I tried holding it on a skewer and covering it but that just ended up gouging out its centre. The technique that I had the most success with was loading up the curved edge with fostering, putting it on the cake and tidying up the top.
It worked pretty well, but I still got a bit of frosting on my fingers. But it still did the job and looked quite impressive.

 The party day arrived and we have five 8 year olds running amok for a few hours, eating fairy bread and such. They were all quite impressed with the cupcakes, arguing over who was going to get which hero. "Happy Birthday" and blowing out the candles all went fine, and so we headed to the Cutting Of the Cake; which did look suitably zebra-ish.

However.

The cake wasn't cooked through.

 I will admit that I wasn't surprised; the cake had fallen in the middle quite a bit when it cooled which is never a good sign. But I basically had a crisp shell surrounding liquid cake - argh!! I think there must have been something wrong with my oven that day as my cupcakes had a few uncooked bits as well and I have made that recipe many times.

Not my finest hour...
 Thanks goodness this Baking Disaster was with a forgiving audience, who went "Wow!!", ate the icing and then went back to playing. I ended up throwing the whole rest of the cake out and feeling like a bit of a Domestic Duffer for the rest of the afternoon. Thankfully Son 1 didn't care as he got to have one of the Deadpool cupcakes ("My favourite, mum!").

 But I will not let this beat me. Obviously the buttermilk cake is not a good option for the zebra cake technique, and definitely not a loaf tin. I think the next time I try will be in a round tin, and using a chocolate mud cake recipe which I know is runny mixture; I will just have to check that my white chocolate recipe is of a similar cooking time.

Or maybe I'll just use a packet mix...

Sunday, 20 October 2013

Fondant and Fondue

 It feels like it’s been a while since I’ve yammered on about food n’ stuff; a few changes at this end have mean there seems to have been less time for faffing about the kitchen and trying new recipes. The fact that October Delicious Magazine’s “20 meals in 20 minutes” got me the most excited in the recent issue is fairly indicative of my current state! But I am determined to get back in the kitchen (in a totally non-sexist, non-50’s housewife kind of way) and flex my culinary muscle: I did make receipe 17 (Chicken Pad Kee Mao) last week, and will make receipe 18 (Thai Beef Salad) this week.

 But the major event of the last month or so was Son 2 turning 5: cue weeks of thinking on a theme and how best to get related food/cake/games/party bags  that look awesome but don’t take too much time or money. Like any good male child we had a superhero party – this year was Batman, which is a great theme as you can basically use anything, as long as you prefix it with “Bat-“. So we had Bat bread (fairy bread cut out with a bat shaped cookie cutter), Bat bikkies (choc shortbread in a bat shape), fruit-Bat sticks (fruit kebabs) – you get the idea. And of course the centre of any good party is The Cake. As you know from previous flogs (Let Them Eat (Decorated Cup) Cake), I am a fan of the Well Decorated Cake. However, after organising over 10 kids parties, I now know that the kids don’t care how many hours you have spent agonizing and frosting and decorating, they just care what it looks like. So I have become a big fan of the Edible Cake topper: there are a heap of (probably at-home-mum) suppliers on eBay who can print out just about anything (even customise them with the kid’s name) and post it to you, which makes cake decorating take…oooh, about 10 minutes. But of course this doesn’t satisfy the Cake Creator within, so another outlet had to be sourced.

 I have started following a series on You Tube called Nerdy Nummies . She is an amateur cook who “… really enjoy(s) making nerdy themed goodies and decorating them. I'm not a pro, but I love baking as a hobby”. I first stumbled across her GingerbreadTardis and have made the bear pancakes (with blueberries for eyes rather the chocolate); as well as the maple syrup cupcakes which I made a second time with variations (banana maple and maple pecan – both yum!). I now also have a long list of cool things I want to try; including the Captain America Cake which will be perfect for July 4th celebrations) and the Lego cakes and.… well, too many to list here! **

 But most importantly for me, she made Batman cupcakes, helped ably by with Batman (who my boys though was Hilarious!)

 The process seemed pretty simple, but I have never used fondant icing. Whether it was fear of the unknown or stubbornness, I had managed so far to get all of my decorating done without fondant; frosting had been fine. I had two girlfriends who had done a course and had learned how to do the whole professional cake-with-fondant and I had always been in slight awe of them. But there is a first time for everything, and I happened to know that there was left over black fondant in someone’s’ cupboard that I could use (it had been a racetrack, and a record and it still kept going). So after a few tips from my Learned Colleagues, I started Cake 1.

 Well, I’m not sure what I was so worried about. It was just like baking cookie – roll out, cut to desired shape stick on.  

 It went so well (and was so quick) that I went back and added the birthday boy’s name. He was suitably impressed; as were guests at the party.
 For my next trick, I decided to make Nerdy Nummies Batman cupcakes for the kid’s birthday party, with a slight alteration. I used yellow frosting (rather than black) and just a black Bat symbol on top (to avoid having to go and buy yellow fondant, and to reduce the number of steps). Again quite simple, however I did have to modify my design to slightly larger than planned, as it was quite tricky to cut fondant shapes that small with the paring knife I was using. I did try and source a “fondant cutting tool” but the ones I found were more to do with cutting long strips than small shapes. Might have to dig out the ol’ dissection kit from uni…..

 But still, I was pretty happy with them:- 
 So there we go, my first foray into fondant, which means I’m sure its only a matter of time before I start churning out things like these …

 ... or even this!!

 So to finish off, a bit on the other “F” word of my title. Delicious magazine has a Latin America Special a few months back, which apart from some super yummy salads (and a citrus margarita recipe) had a recipe for Queso Fundido; which I’m sure translates to “yummy cheesy fun”. It is a Mexican cheese fondue, topped with chorizo and served with potato skins (has your cholesterol shot up just thinking about it??). I had only had potato skins once before; back at Planet Hollywood (in the same meal that I had their divine Snickers pie for dessert *sigh* - back in the day where I could eat that in the same meal without even thinking twice about it!). So I knew they were yum, but always seemed a bit fiddly. My plan was to have them as the entree of a fabulous Mexican feast-dinner party, but I couldn’t seem to find the time, and so just decided to make them for Hubby and I one Saturday night.  The potato skins were fairly straight forwards, they just took a bit of time (bake 90 mins, scoop out centre, bake for another 20 mins), but they were worth it, and stayed in one piece while we scooped out the divine gooey mess of cheddar and mozzarella cheese melted with fried chorizo sprinkled on top. Soooooo yum. But definitely a Sometimes Food! Would be brilliant as part of a mid-winter feast like your traditional fondue, but with less chance of the forfeits caused by dropping your bread.
Fabulous!!

**so do yourself a favour and have look at her videos!  She covers a whole range of nerdy topics and makes everything quite simple for the amateur cook. So much fun and inspiration!

Sunday, 6 January 2013

Let Them Eat (Decorated Cup) Cake!

  So here is my latest Thing; where “Thing” is loosely defined as That Which I am currently Getting Excited over, which consumes my Thinking Time and often ends up with spending money.

 Cake Decorating.
 Which has kind of been a simmering Thing for a few years now, but has recently gone to the full rolling boil.
 There are a few sources from which this Well of Enthusiasm for the Icing and the Piping may have sprung. Firstly the many childhood hours spent pouring over the Women’s Weekly Birthday Cake Book (the original with the train cake on the cover – all good 80’s mums had one!) and deciding which of the amazing cakes I would have to the next 5 birthday parties. I never did end up getting The Castle but O Joy! O Rapture! the year my mum learned how to make a Dolly Varden ice cream cake!!
 Or maybe it was the rather impressive cakes my girlfriend made for her daughter’s parties (she was the first child born in our group of friends). The cakes in the first few years were good, but then she really hit her stride and we were treated to an Emerald City (for a Wizard of Oz themed party; it was The Castle! In green!!), a merry-go-round, and even a foray into rolled royal icing with a moulded sleeping child. So the bar had kind of been set high.
 

 My own personal forays were what I’d call Simple But Effective; they didn’t take hours to make (some of the above-mentioned took up to four hours to create, baking not included!) but still looked good.

 We had Mr Hankey (from South Park) ...
  … Mud Cake cut into shape with licorice arms and mouth, marshmallow hands and hat trimming and a red roll-up (how that stuff is termed  ”fruit” I have no idea) for the hat.
  Got a bit more creative for a Murder-Mystery Birthday party; props, different colored icing, “piping” and even food coloring fingerprints.


 Then I became a mum and had two annual (and sometime up to 4) birthday parties (and thus cakes) a year. Before I discovered cake toppers (the amazing printed icing sheets that kids think are waaaaaay more impressive than anything you take hours to make, and only take 10 minutes for you to decorate your cake! Win-Win!!), I did the number-cake thing for a few years. But I did refer back to the WW Cake Bible to make a Mickey Mouse…

…as well as a Spiderman. Hint – the ‘writing icing’ you can buy at the Supermarket is a godsend!!

 So all not-too-tricky, looked quite good and everyone happy.
 Then I had the delightful opportunity to go along to a Mamma Bake Cake decorating class (www.mammabake.com.au). They come along to your house and bring EVERYTHING necessary (cupcakes, icing and ganache, piping bags and tips, patient instructor) to learn how to make amazing looking cupcakes! Brilliant!! They also sold all the tools required so I came home with six beautifully decorated (if oddly coloured) cupcakes, a new set of piping equipment (sorry Tupperware, your set was just not cutting it) and Enthusiasm to make hundreds more cupcakes.

  But where precisely was I going to use these fabulous new skills? Being a mum of two boys meant I wasn’t going to be called on very often to make roses and flowers for their cakes. In fact, Son 2’s response to my cakes? “They’re very girly ...” So I knew I had to get creative to use my new creativity.
 Luckily Christmas was coming up, and with it, lots of Catch-Ups and Dinners and Bring-a-Plates. Excellent.

 First up were some Rudolph cupcakes straight from the Mamma Bake website. I did tweak them a bit so I only had to make one lot of ganache, but as this meant there were more lollies involved so I didn’t hear any complaints!

   
 So we had piped chocolate ganache, pretzel antlers, white chocolate button with MnMs for eyes, and a half marshmallow with a half jelly baby (because I had them in the cupboard!) for the nose. They looked great and the kids (of which there were 9 at this particular gathering) devoured them with great joy. Well, they devoured the icing at least (though I’m proud that my son was one of the only to eat the cupcake as well – a good kid who appreciates good baking).
 So this was a great First Experience that taught me a few things: ganache takes a LONG time to cool/set before it gets to a good piping consistency (chilling it in the fridge helps but it still takes a few hours). And I really needed to invest in a cupcake carrier! There were quite a few large roundabouts to navigate on the way to The House, which I took at a very slow and sedate speed (Must Protect Cupcakes!!).

 Next up was a Christmas Family Gathering. I had been inspired by a photo on the Mamma Bake website of some very cute themed cupcake designs which would enable me to use more of the piping tips and techniques I had learned. So I created a few more designs of my own, baked a batch each of chocolate and vanilla cupcakes, dipped them all in white chocolate ganache, coloured my butter icing (red and green of course) and I was Ready to Pipe.

 Two not-as-frustrating-as-I-thought-it-may-have-been hours later, I had these….
 Not too bad methinks. There was lots of practising first and remembering the techniques (“ohhh, you hold it the Other way!”) and switching back and forth between colours and tips but I was pretty happy with my effort.
 And so was everyone at the party – lots of “oooohs” and “aaaahs” and “did you make those???” However, no one seemed to want to actually Eat any of them! Apparently they DID look too good to eat. Hmmm, a problem perhaps? But I did manage to send everyone home with one for their morning tea the next day, which was great as it meant I didn’t have to eat 20 or so cupcakes!

 My most recent foray was more exciting as I got to make flowers and decorate pretty girly cupcakes. My girlfriend's little girl was having her first birthday party the weekend before Christmas, and if a First Birthday isn’t the time to go all pink and flowery (especially as she has two older brothers) then I don’t know when is!! I had pretty pink proper cupcake papers (try saying that three times fast!) from her mum which made things a little interesting, in that they made taller and thinner cupcakes than the traditional concertina papers. This changed the cooking times and meant I had less “area” on top of the cupcake to work with. As I had done my previous “practice” on larger diameter cupcakes I was a little concerned about whether there would be any issues with the smaller space. Plus I was piping ganache with a smaller tip which we hadn’t been shown in class (so I wasn’t sure how it would turn out or if it would work at all). PLUS it was the first time I was making Proper Flowers since the class. So after a few deep calming breaths, I waded in.

 The flowers went alright….

 And the rest of them turned out pretty good as well!
The 6 different designs
Close up of The Rose
 
Ready for the Party!
  But again, hardly any were eaten at the party! Whether the papers made them too tricky to eat (you have to rip them away from the cupcake; much trickier than the normal papers), or people were put off my too much icing/decoration on top (I try not to pipe too high or too much as this is something I don’t like about a lot of cupcakes; when there is more frosting than cake!), or again they were “too pretty to eat”, even though I had made some “simpler” designs (such as the ‘1’ and ‘A’)  that would be easier to eat. Hmmm … this is not a good pattern developing here. But I still had fun doing them (and I’ve got to get value for money from my piping set) so I will carry on!

 Next Up? I’m looking for inspiration for some Lego related cupcakes for Son 1’s birthday.

Pipe on!